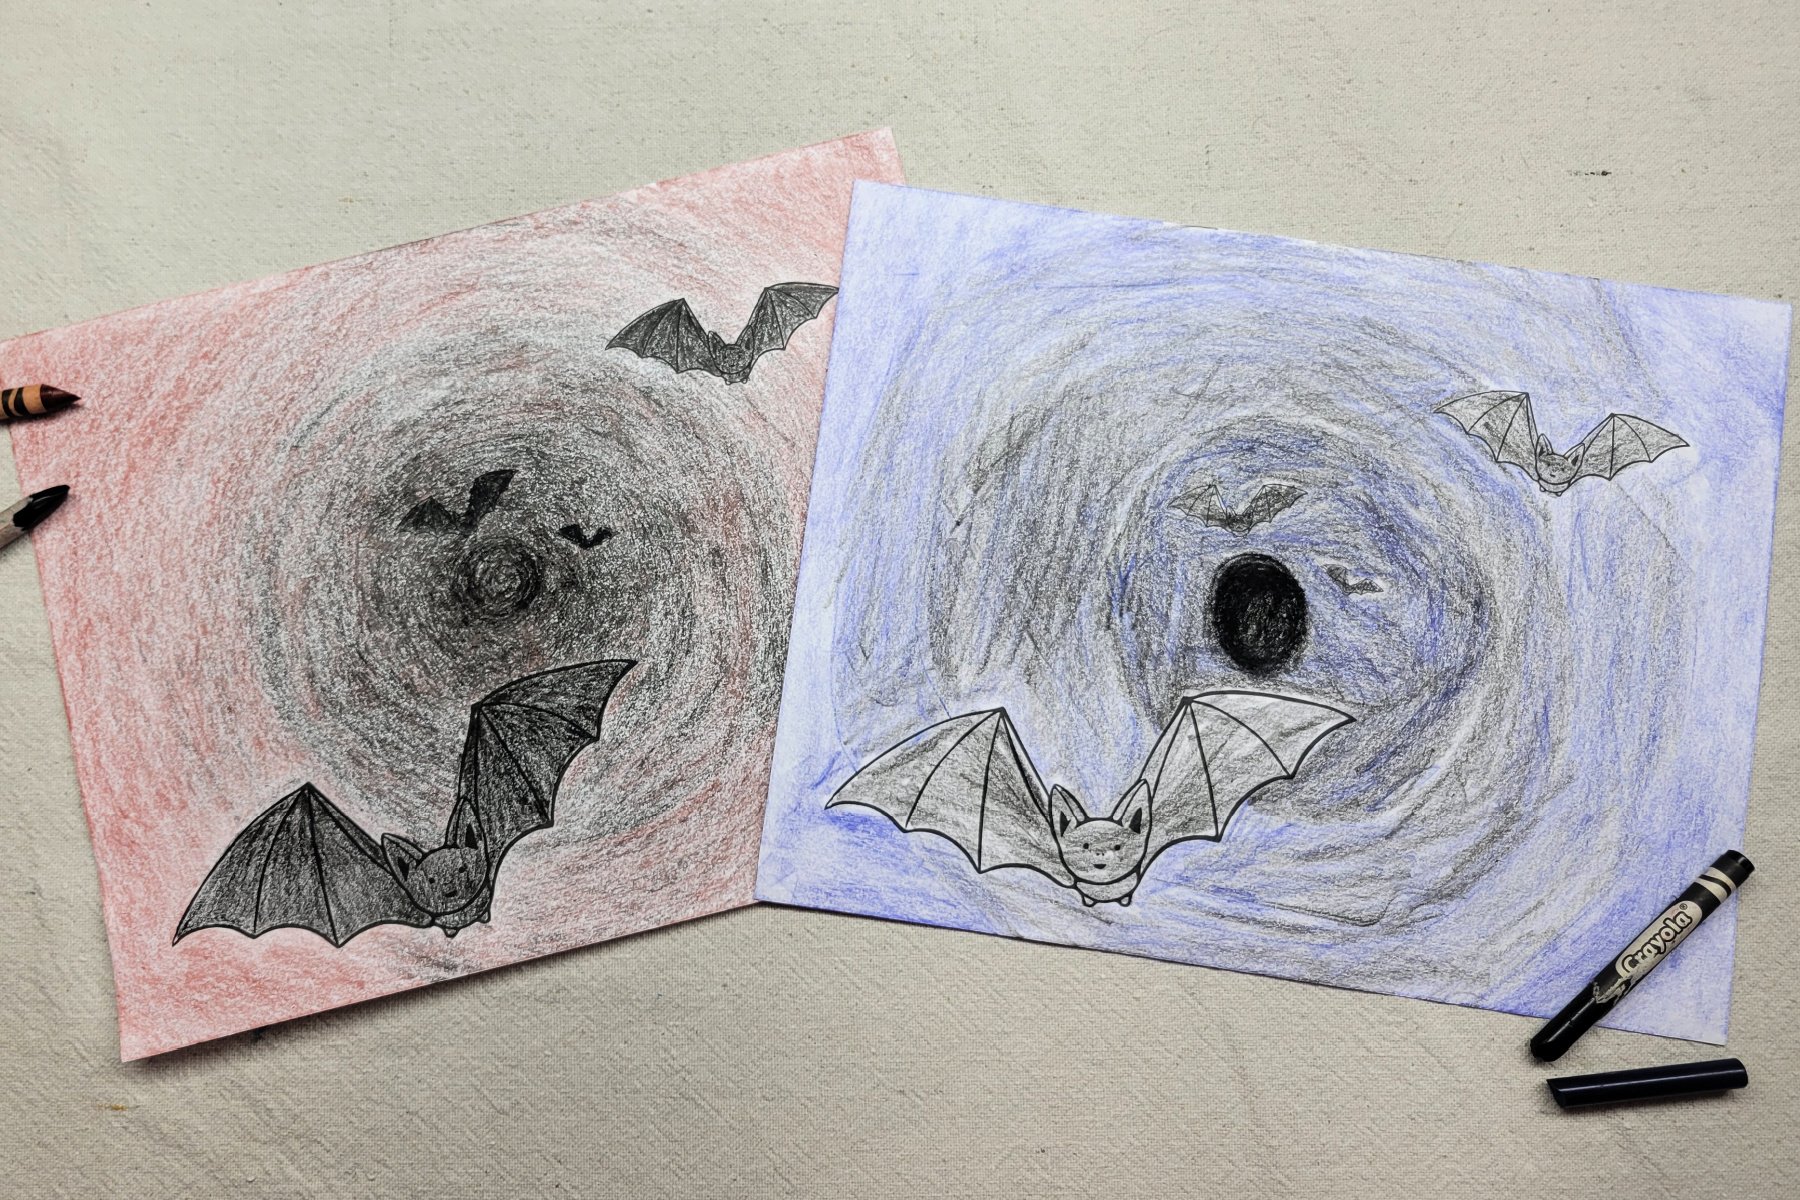
School-aged kids learn about using color shades with this bat cave art project. This project is easily completed at home or in the classroom using a few supplies and free printable worksheets.
“Shade” in Color Theory
When artists use shade to alter colors, they are simply adding black to a color. Artists are able to use black to increase darkness within that color and then use those shades throughout their artwork.
Related: Learn about Tone with this leaf painting project.
Supplies Needed to Make this Bat Cave Art Project for KIds

- Free Printable Bat Cave Worksheets – Download Below
- Coloring Medium of Choice – crayons, colored pencils, etc. One color and black for each kid.
- Optional: Tissue
Download the Bat Cave Printable Worksheets Here
Using this download saves kids time from drawing the designs themselves. Extra time lets kids focus on learning about mixing colors and completing their project.
Directions to Make this Bat Cave Art project
Before beginning, please note that kids do not need to color with much pressure in this activity. Applying too much crayon, colored pencil, etc. early on will not allow easy layering of colors. The paper will be “full” of their first color and unable to hold another. It will also be helpful if kids angle the crayons when coloring to avoid using the very tip.
Step 1

Begin by coloring the first box on the shade scale with black.
Step 2

Moving to the second box, kids alternate coloring the box between black and their choice of color. Black, color, black.
Step 3

Continue along the scale adjusting color and black ratio until worksheet is complete. Set aside.
Step 4

Moving to the bat cave printable, kids use their black crayon to color a circle in the middle of the paper.
Step 5

Next, kids will color rings around the black circle following the shade scale, with the first ring using the ratio of Black: 2, Color: 1. Kids continue coloring and blending rings over the entire background until the outer edges of the page are completed with pure color. By having the darker colors smaller, and in the middle, projects will give the illusion that the bats are flying from a cave.
Step 6

Color bats and add any details or further blending.
Step 7 (Optional)

You may notice pictures beginning to shine as a lot of crayon is added to the page. This is known as burnishing. Simply rub the entire picture with a soft tissue to make the shine appear smoother.
Finished Bat Cave Art Project for kids

This is such a fun and easy project to introduce kids to various color shades. Since these projects are made on paper, they are easily framed, clipped, or displayed in your preferred style.
Our Experience Making this bat cave Art Project
We enjoyed this quick lesson on color shading. It’s fun to explore various colors to see how they change when adding black. I love that it also gives kids a lesson on blending colored pencils, crayons, pastels, etc. I definitely recommend using older crayons because this project does wear them down.
Prep Time
5 minutes
Active Time
20 minutes
Total Time
25 minutes
Difficulty
Medium
Estimated Cost
$1
Materials
- Free Printable Bat Cave Worksheets
Tools
- Coloring Medium of Choice – crayons, colored pencils, etc. One color and black for each kid.
- Optional: Tissue
Instructions
Before beginning, please note that kids do not need to color with much pressure in this activity. Applying too much crayon, colored pencil, etc early on will not allow easy layering of colors. The paper will be “full” of their first color and unable to hold another. It will also be helpful if kids angle the crayons when coloring to avoid using the very tip.
- Begin by coloring the first box on the shade scale with black.
- Moving to the second box, alternate coloring the box between black and another color. Black, color, black.
- Continue along the scale adjusting color and black ratio until worksheet is complete. Set aside.
- Moving to the bat cave printable, use a black crayon to color a circle in the middle of the paper.
- Next, kids will color rings around the black circle following the shade scale, with the first ring using the ratio of Black: 2, Color: 1. Continue coloring and blending rings over the entire background until the outer edges of the page are completed with pure color.
- Color bats and add any details or further blending.
- Optional: Rub the entire picture with a soft tissue to make any shine appear smoother.
Notes
Bat Cave Art Variations
- Have kids draw their own cave scene.
- Avoid using the printable and simply cut bat silhouettes from black paper to glue onto colored background.
- Use cardstock for the printable worksheets and complete project using watercolor or acrylic paints.
Bat Cave Art Variations
- Have kids draw their own cave scene.
- Avoid using the printable and simply cut bat silhouettes from black paper to glue onto colored background.
- Use cardstock for the printable worksheets and complete project using watercolor or acrylic paints.
Other Fun Bat Projects from Kids Activities Blog
Did your kids enjoy creating this bat cave art project? What color did they choose to use?

