Create this fun cardboard tube stamp tree art project with a few simple materials! This art project is good for classroom or home settings for children ages four through eight. It is quick and easy to set up, encourages creativity, works on fine motor skills and it is very easy for the kids to make this fun art!
Tree stamp Art for k-2nd grade
Creating these tree stamp art projects are both easy and fun. All you need is a few cardboard rolls, some paint or ink pads, and markers! It is both easy to set up this art project, and easy for kids to make! Including set up and clean up it takes about 20 to 30 minutes to make this art project.
Related: Print some leaf templates to make this art project more fun!
This art project is great to allow kid to learn about nature while making a fun art project and it can help develop fine motor skills by coloring the tree stump and using stamps to make leaves. You can enhance this art project by encouraging the kids to be creative and teaching them about different kinds of trees or why leaves sometimes change colors.
This article contains affiliate links.
Supplies Needed

steps to make this tree stamp art project
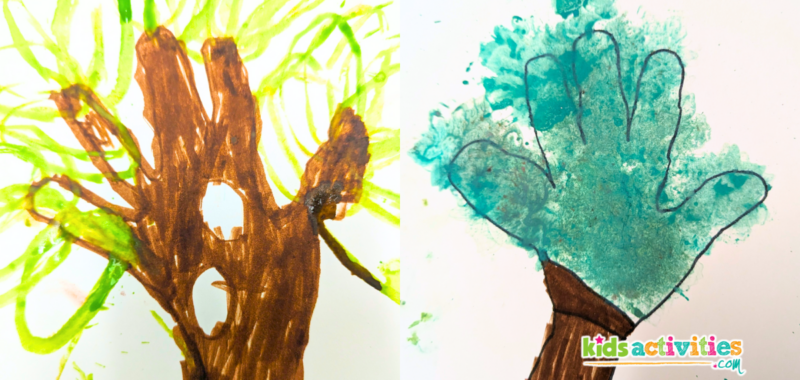
1: Trace your hand

First you will need to trace your hand on the paper to create the stump and branches of the tree make sure to also trace some of your arm so that the tree is nice and tall! If you want you can color in the tree stump and branches with markers, or if you are using paint you can make the project extra fun by making a handprint out of paint instead of tracing!
2: Fold Cardboard Roll to look like a leaf

To create a stamp to use for leaves on the tree, take a cardboard roll and pinch to ends to make it leaf shaped. You can cut the cardboard rolls in half to make more stamps if needed.
3: Use the stamp to make leaves

Now you will need to decorate your tree with leaves. Use the stamps to create leaves, you can also add other stamps or use markers for flowers, frogs, birds, and more!
Finished Tree Stamp Art Project!

This is the finished results of this art project! These were from a 30 minute rotation at summer camp! It was really easy for them to make and they all took their time to be creative and have fun. Originally I wanted to use paint for this art project however we did not have access to paint yet, so I found that you could make this art project with ink pads too and it worked even better! This art project was really quick to set up for our rowdy first day of summer camp but it was super fun!
Prep Time
5 minutes
Active Time
20 minutes
Total Time
25 minutes
Difficulty
easy
Estimated Cost
$0
Materials
- Cardboard tubes
- Ink Pads or Paint
Tools
- Markers
- Stamps (Optional)
- Paper
Instructions
- Trace your hand for the tree stump and branches.
- Fold cardboard rolls to look like a leaf.
- Use cardboard rolls as stamps for leaves.
Related art projects from kids activities blog
Did you like this art project? Tell us your favorite part in the comments below!