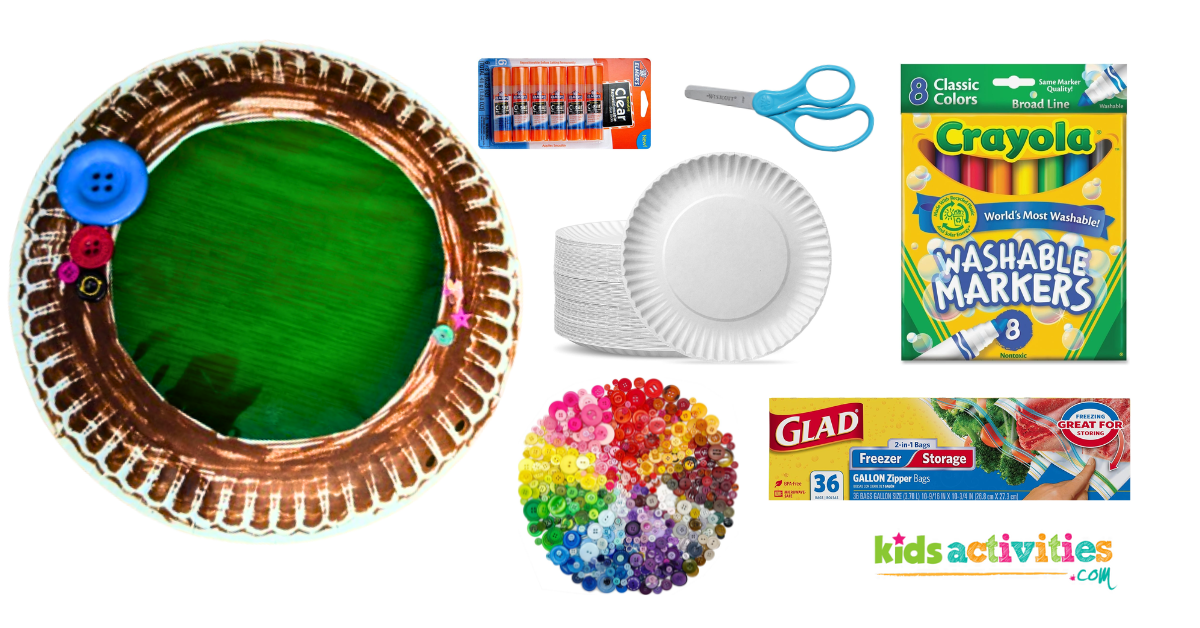
Lets make these super cool scuba diving mask art projects to explore the ocean with paper plates and plastic bags! This is the perfect activity for kids ages 4-8 both in a classroom or home setting. With this fun and easy art project kids can get creative and curious about the ocean with a few simple materials. This craft is simple but a unique hands on activity to learn about the world under the waves!
Scuba Mask Art Project
To make these scuba masks even more fun, you can experiment with different colored plastic bags and paper plates. This allows kids to express their creativity and explore the different color combinations. It also is super fun to look through the colorful plastic and see the world in a whole different hue! You can also use all kinds of shells, buttons, sequences, and even natural material from the outdoors!
Related: If you have more paper plates try this paper plate shark art project too!
Another way you can improve this art project is with a hole puncher to add holes to each side of the mask. With some string through both sides the mask can be worn and keep your hands free for ocean exploration to swim through the coral reefs and discover hidden treasures on the ocean floor! This activity will foster creativity in an exciting way for kids to lean, get creative, and stay curious!
This article includes affiliated links.
Supplies you will need for this art project

Steps to make scuba mask art projects
1: Add the window for the mask

Fold the plate in half to create a slit in the center. Then cut out the center of the plate leaving the outer ring together. Then take a plastic bag and cut it so that it is only one layer of plastic. From the inside or top side of the plate, glue the plastic bag down to the plate. If needed, cut the extra plastic off around the edge.
2: Decorate the mask with markers and buttons!

Now its time to decorate the mask! Color the plate with markers, glue on buttons, sequences, sea shells, sand, and glitter, maybe you could even add some grass from outside to make it look like the mask is covered in sea weed. Whatever you want to use to decorate the masks, go for it!
3: Add string to the masks (Optional)

The last part of this art project, you can use a hole puncher or carefully cut two holes on opposite edges of the plate. With a long string, preferably the length of your arm, thread it through both holes. You can put the mask on and pull the strings so that it is tight enough to stay on but loose enough to slide off, then tie the strings together and trim any leftover string. Now you have a super cool diving masks to explore the depths of the sea!
This is Our scuba mask art project

This was our scuba mask art project. We used colorful plastic bags for this project and had a blast looking through the masks and seeing everything with so much color! The kids absolutely loved making these and this was a great photo opportunity for our summer camp. This was such a cool ocean themed art activity!
Prep Time
5 minutes
Active Time
25 minutes
Total Time
30 minutes
Difficulty
Medium
Estimated Cost
$1
Materials
- – Plastic bags
- – Paper plates
- – Buttons and other decorations
- – String (optional)
Tools
- – Markers
- – Scissors
- – Glue sticks
- – Hole puncher (optional)
Instructions
- Fold the plate in half, create a small slit, and cut out the center of the plate.
- Cut the plastic bag so that it is only one layer of plastic and glue to the inside of the plate.
- Cut off extra plastic, then flip it over and decorate the mask.
- Use a hole puncher or cut a small slit on both sides of the mask, then tie a string on both ends to hold the mask on (optional)
Ocean activities from kids activities blog
What can you explore with your scuba masks? Tell us in the comments below!

