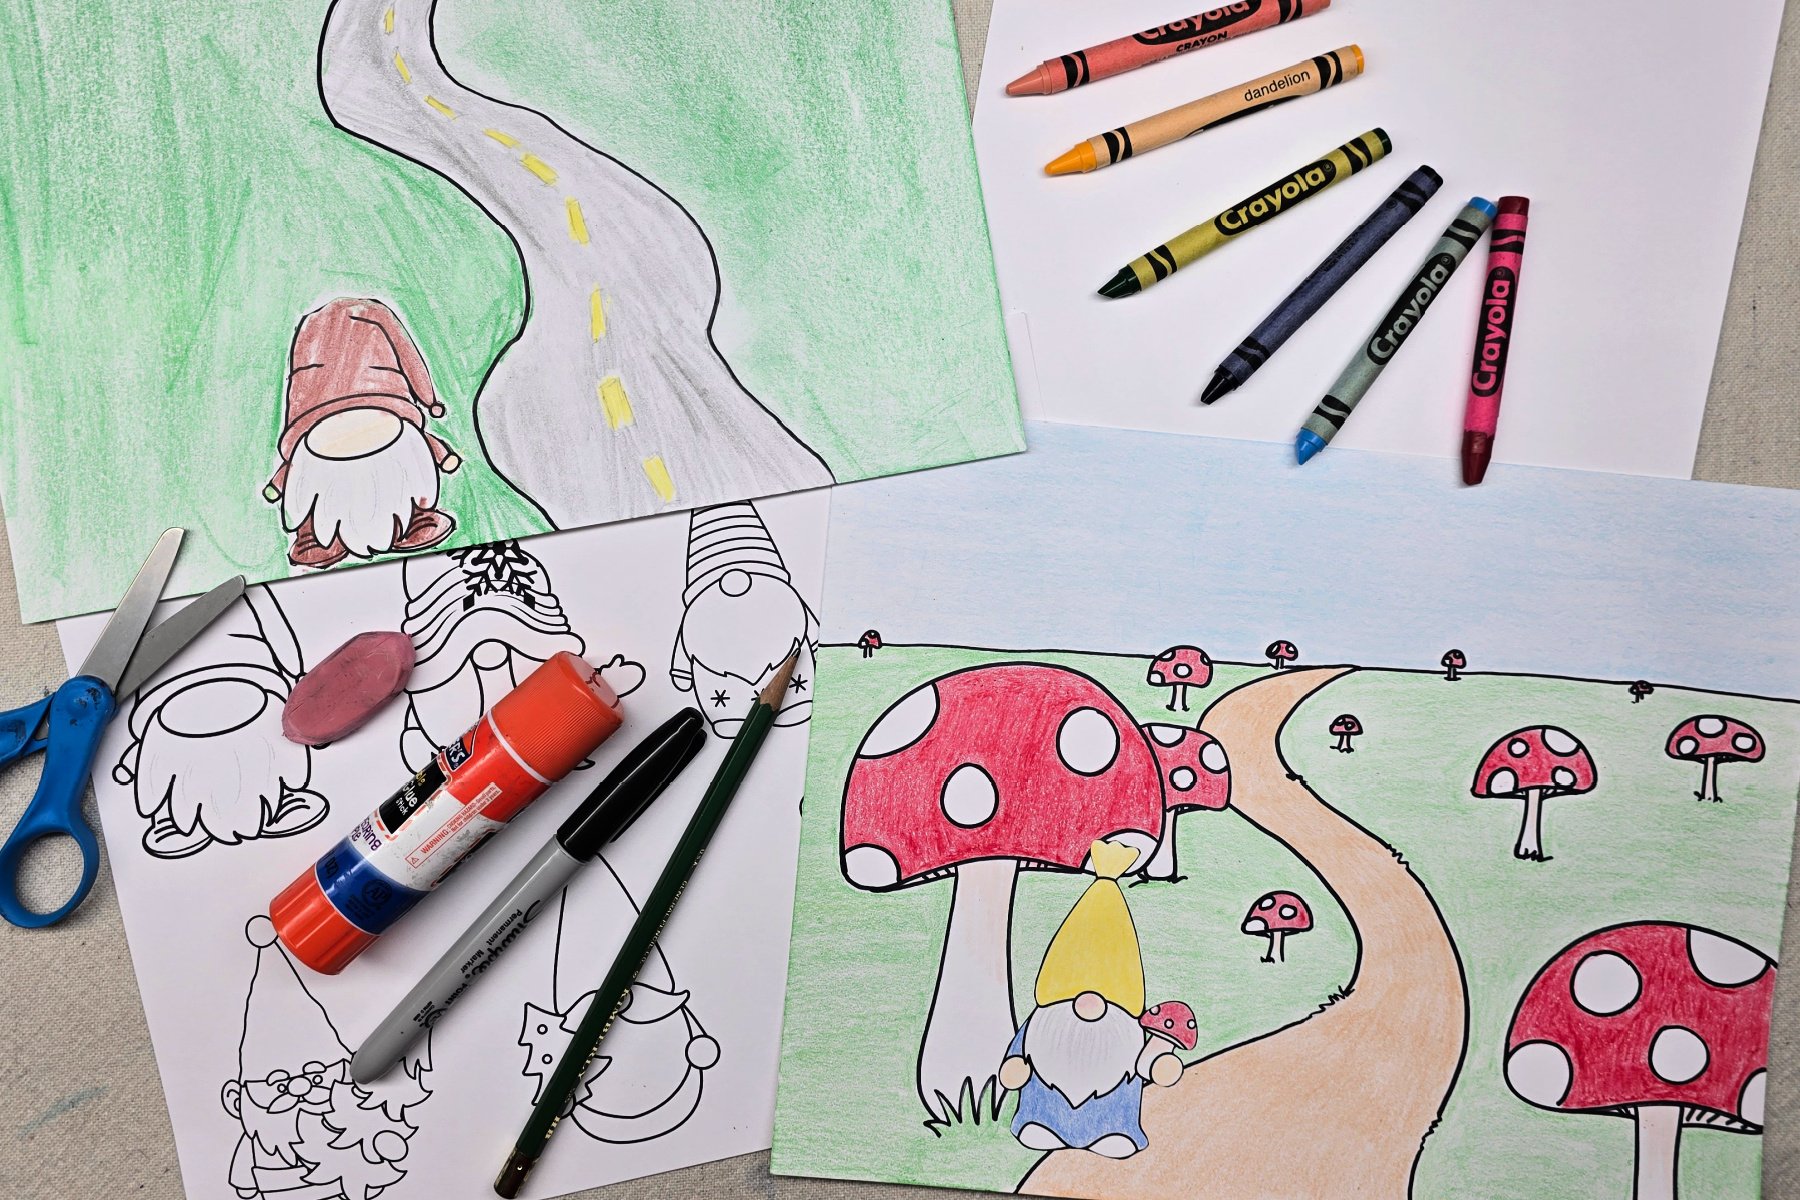
School-aged kids will learn how to apply S shaped composition to their artwork in this fun project. Weâve included a free printable to make this lesson easy for home or classroom use.
Composition
âComposition is the placement or arrangement of visual elements or ingredients in a work of art.â
â Kiddle â
In todayâs project, kids will create art which begins with a simple S-shaped line. This guideline will create the framework for the S composition, easily demonstrating one of the many composition styles used by artists throughout the years.
Related: Learn about L composition using the same gnome printable!
Supplies Needed to Make this S Composition Art Project

- Free Printable Gnomes (Download Below) â Printed on Cardstock
- Blank Cardstock
- Scissors
- Stick Glue
- Pencil
- Permanent Marker
- Coloring Medium of Choice â Crayons, Colored Pencils, Markers, etc.
Download the Gnome Printable Here
This free printable jumpstarts kidsâ creativity by giving them a main character for their artwork. Kids simply choose a gnome and create a scene around it.
Directions to Make S COMposition Art
Step 1

First, choose a gnome to color and cut from the printable.
Step 2

Next, use a pencil to lightly draw and s-shaped line on the blank cardstock. The bottom of the S should reach the bottom of the page.
Step 3

Then, draw another S-shaped line beside the one drawn in step 3. The two lines should be close to one another at the top and slowly get further apart as the line reaches the bottom of the page.
Step 4

Place gnome cut out on cardstock with S sketch. Determine placement and complete scenery. Keep items that are towards the bottom of the page larger than those that are closer to the top of the S. This will help to add dimension to the drawing.
Step 5

Using a permanent marker, trace and finalize sketch. Erase unwanted pencil lines.
Step 6

Color in drawing by using crayons, colored pencils, or markers.
Step 7

Finally, use glue to attach gnome to drawing and add any finishing touches.
Finished S Composition Art Project

I love how easy these cute little gnome creations are to make! Since these projects are made on paper, they can easily be framed, clipped, or displayed with your seasonal decorations.
Our Experience Making this S Composition Art Project
This project was a lot of fun and an easy introductory lesson to S composition and dimension. Kids easily practice adding dimension without even realizing it when drawing items smaller towards the top of the S and larger near the bottom! I also love the little gnome graphics and the variety of scenes kids create around them.
Prep Time
5 minutes
Active Time
15 minutes
Total Time
20 minutes
Difficulty
Medium
Estimated Cost
$1
Materials
- Free Printable Gnomes (Download Below) â Printed on Cardstock
- Blank Cardstock
Tools
- Scissors
- Stick Glue
- Pencil
- Permanent Marker
- Coloring Medium of Choice â Crayons, Colored Pencils, Markers, etc.
Instructions
- Choose a gnome to color and cut from the printable.
- Use a pencil to lightly draw and s-shaped line on the blank cardstock. The bottom of the S should reach the bottom of the page.
- Draw another S-shaped line beside the one drawn in step 3. The two lines should be close to one another at the top and slowly get further apart as the line reaches the bottom of the page.
- Place gnome cut out on cardstock with S sketch. Determine placement and complete scenery. Keep items that are towards the bottom of the page larger than those that are closer to the top of the S. This will help to add dimension to the drawing.
- Using a permanent marker, trace and finalize sketch. Erase unwanted pencil lines.
- Color in drawing by using crayons, colored pencils, or markers.
- Use glue to attach gnome to drawing and add any finishing touches.
Notes
S Composition Art Variations
- Skip the printable and have kids fully create their own designs.
- Complete project using watercolor or acrylic paints.
- See how many different S compositions kids can create using a variety of the gnomes.
S Composition Art Variations
- Skip the printable and have kids fully create their own designs.
- Complete project using watercolor or acrylic paints.
- See how many different S compositions kids can create using a variety of the gnomes.
Other Fun Art Projects from Kids Activities Blog
Did your kids enjoy creating S composition art? Which gnome was their favorite and what scene did they create?

