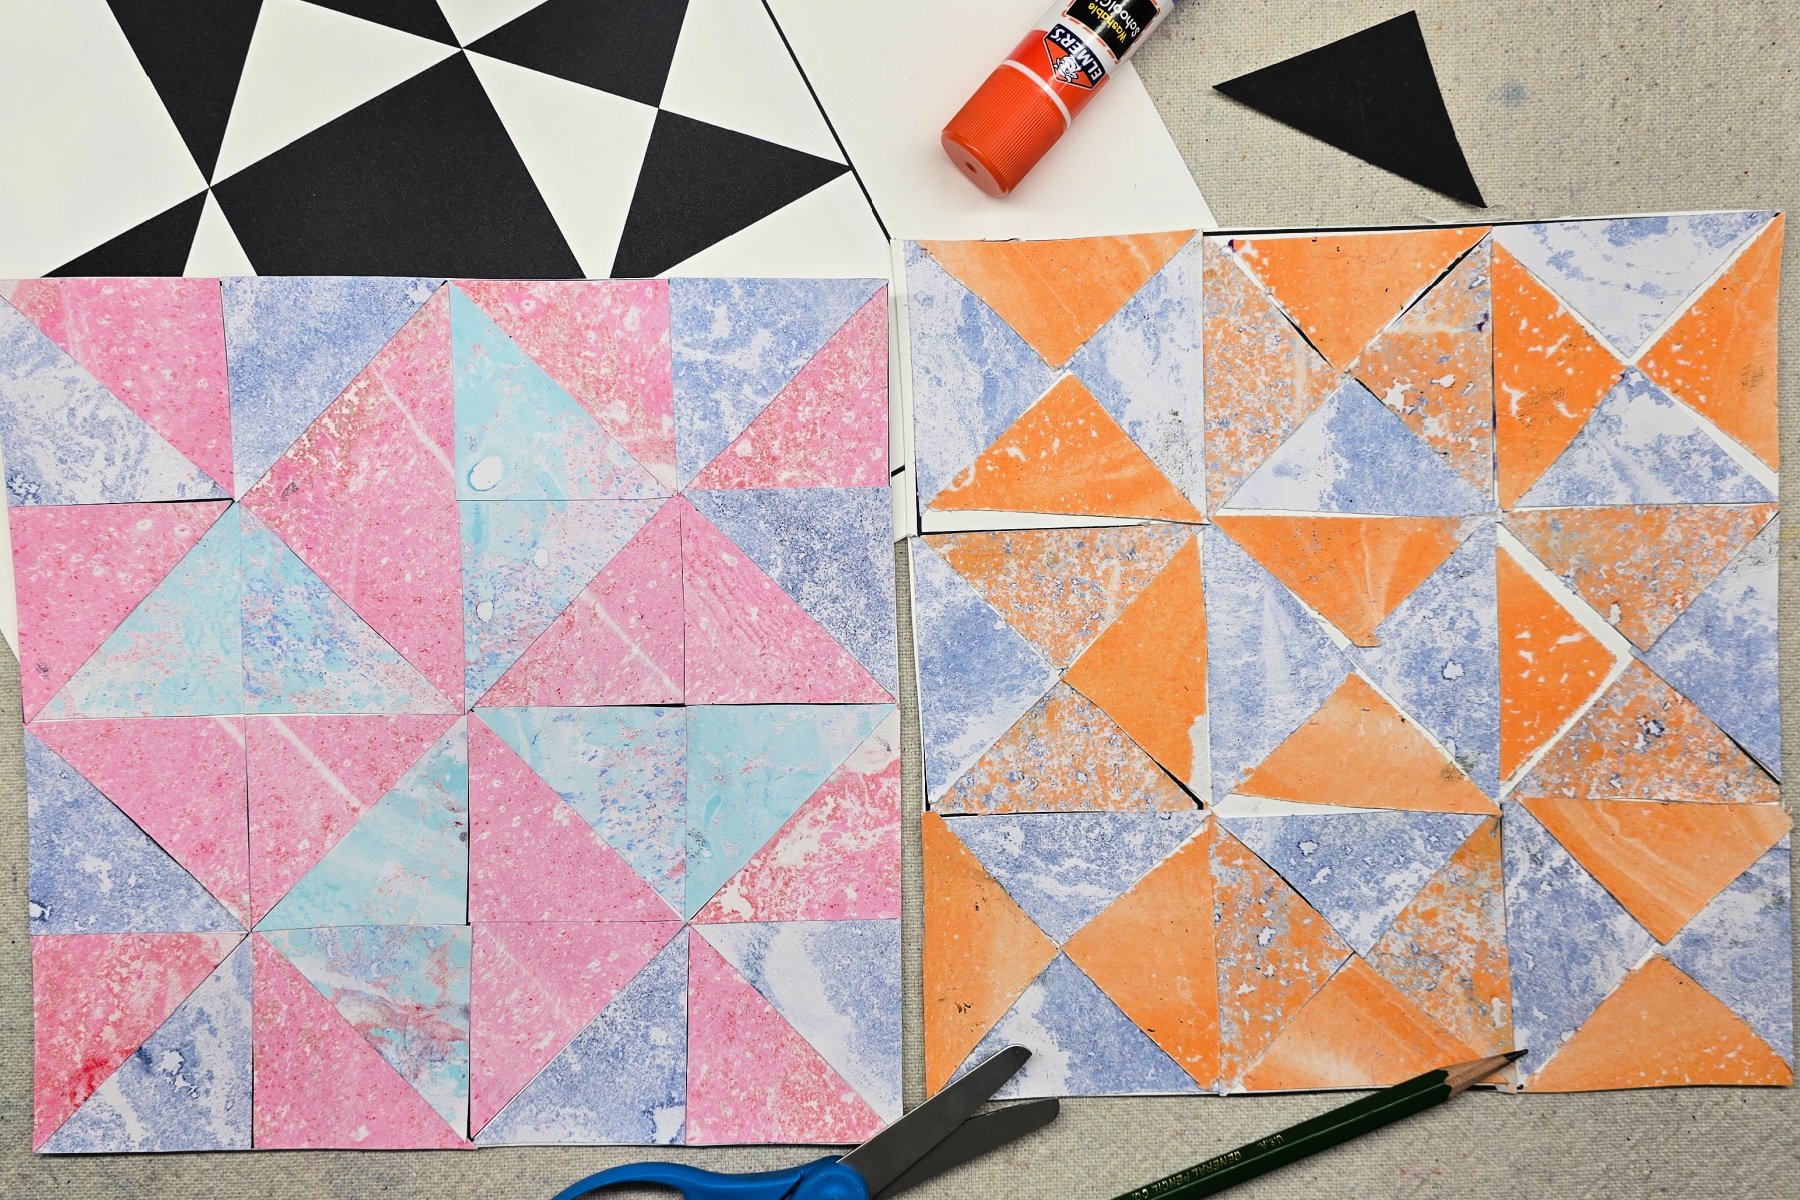
School-aged kids will create a paper quilt square in this easy project. Weâve included a free printable to make this lesson easy for home or classroom use.
Quilt Squares
Quilters create a number of quilt squares that are then pieced together to form one large quilt. When quilting, it is very important to precisely cut each piece where the square will fit together as intended. In this lesson, kids will each create a quilt square from scrap paper. This lesson gives kids and opportunity to practice cutting skills and piecing together their own quilt. Make it a group project and piece together your own classroom paper quilt!
Related: Kids can also work together to create a monster drawing.
Supplies Needed to Make this scrap paper quilt square Art Project

- Free Quilt Square Template (Download Below) – printed on cardstock
- Scrap Paper
- Scissors
- Glue
- Pencil
Download the Quilt Square Printable Here
This printable offers paper quilt templates ranging in a variety of skill levels. Each template comes with a pattern piece for kids to easily follow when cutting their scrap paper.
Directions to Make a scrap paper quilt square
Step 1

First, kids carefully cut the triangle shaped piece from the bottom of their template page. This triangle piece will be the pattern used for their entire quilt square.
Step 2

Next, trace the triangle pattern onto the back of your scrap paper pieces that will be used for the quilt square. Show kids how 4 triangles easily fit together to make a square. Tracing pieces in this way will help kids better align pieces for cutting and visualize how paper scrap pieces fit together on their quilt square.
Step 3

Then, cut scrap paper into triangles.
Step 4

Align scrap paper triangles onto the quilt square template to determine placement and color scheme.
Step 5

Next, kids carefully glue scrap paper triangles to the quilt square template, taking extra care to properly align each piece.
Step 6

Finally, cut completed quilt square from template.
Finished scrap paper quilt square Art Project

I love how these quilt squares look! It’s so fun to piece a lot of them together for a collaborative project. Since these projects are made on paper, they can easily be framed, clipped, or displayed in your preferred style.
Our Experience Making this scrap paper quilt square Art Project
It’s always fun to find ways to use scrap papers or repurpose old art projects. I like how this project helps kids slow down and focus on their cutting, recognize patterns and see how shapes fit together to create various designs.
Prep Time
5 minutes
Active Time
20 minutes
Total Time
25 minutes
Difficulty
easy
Estimated Cost
$1
Materials
- Free Quilt Square Template â printed on cardstock
- Scrap Paper
Instructions
- Carefully cut the triangle shaped piece from the bottom of the template page. This triangle piece will be the pattern used for the entire quilt square.
- Trace the triangle pattern onto the back of your scrap paper pieces that will be used for the quilt square. Show kids how 4 triangles easily fit together to make a square. Tracing pieces in this way will help kids better align pieces for cutting and visualize how paper scrap pieces fit together on their quilt square.
- Cut scrap paper into triangles.
- Align scrap paper triangles onto the quilt square template to determine placement and color scheme.
- Carefully glue scrap paper triangles to the quilt square template, taking extra care to properly align each piece.
- Cut completed quilt square from template.
Notes
Scrap Paper Quilt Square Art Variations
- Piece together a lot of squares to create a paper quilt display.
- Use seasonal scrapbook papers or designs to complete square.
- Paint, dye, or design your own paper to use for this project.
Scrap Paper Quilt Square Art Variations
- Piece together a lot of squares to create a paper quilt display.
- Use seasonal scrapbook papers or designs to complete square.
- Paint, dye, or design your own paper to use for this project.
Other Fun Pattern Art Projects from Kids Activities Blog
Did your kids enjoy creating scrap paper quilt squares? Do they have a new appreciation for quiltmakers and their cutting precision?

