[ad_1]
Middle school aged kids and above will learn how to draw using two-point perspective. This project is easily completed at home or in the classroom.

Why learn two point perspective?
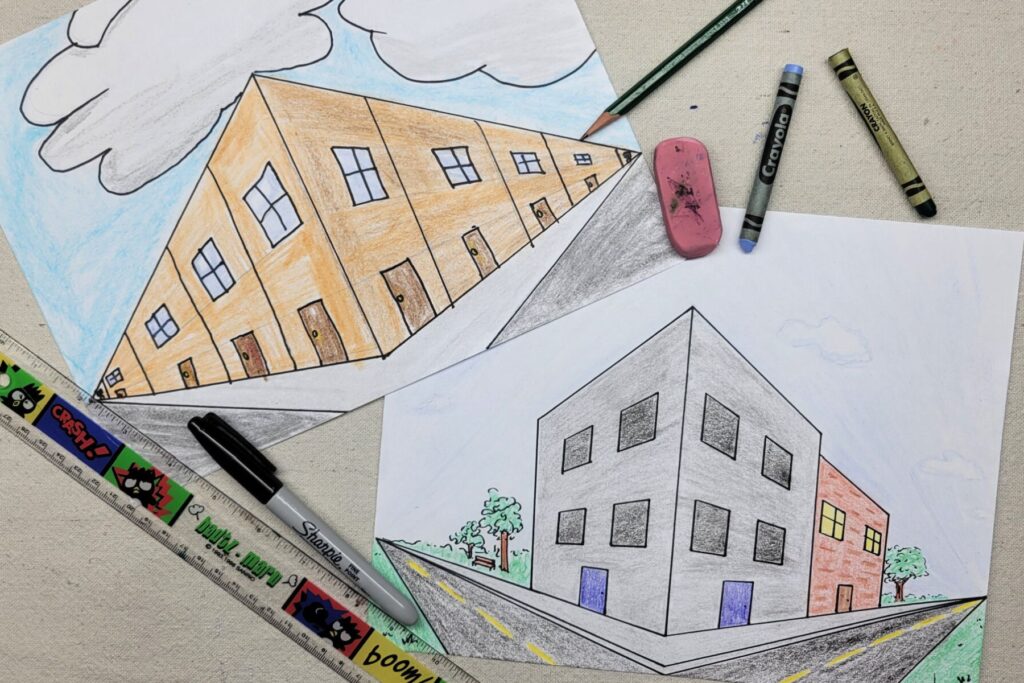
Artists use perspective to give the illusion of depth, distance, size, etc. We’ll work on the basic framework of two point perspective in this project. Two point perspective simply means there are 2 vanishing points. These two points will be where kids direct guidelines for placing items within their artwork. Items closest to the vanishing point appear smaller and further from the viewer. Once kids learn how easy it is to draw in two point perspective, they can then use that knowledge to enhance future projects.
Related: Younger kids may enjoy our Interactive Dinosaur project featuring one point perspective.
Supplies Needed to Make This Two Point Perspective Art Project

- Paper
- Ruler
- Pencil
- Permanent Marker
- Coloring Medium of Choice – crayons, colored pencils, markers, etc.
Directions to Make Two Point Perspective Art
Step 1

In line with one another, kids make 2 dots on each side of the paper. These are the two vanishing points where perspective guidelines will meet.
Tip: Encourage kids to draw lightly in this project. We’ll be making lots of guidelines that may need to be erased later on. Drawing lightly will make erasing easier.
Step 2

Using a ruler, lightly draw a vertical line approximately in the center of the page. Kids need to leave gaps between the top and bottom of the page and line. This will be where the guidelines merge, creating an edge for the corner building.
Step 3

Use the ruler to draw two lines from each vanishing point connecting to each end of the vertical line drawn in step 2. Kids may choose to add more later lines based on their design ideas.
Step 4

Staying within these vanishing point guidelines, complete the sketch. Kids are encouraged to add more guidelines as needed, either vertical or connecting to the vanishing point. To achieve two-point perspective, all details within this project need to adhere to the guidelines regardless of whether kids are drawing buildings, trees, people, etc. Items closer to the vanishing point should appear smaller and further away.
Step 5

Kids now use a permanent marker to trace over sketch lines they wish to keep in their final project. Erase all unnecessary guidelines.
Step 6

Using medium of choice, kids color and complete their masterpieces.
Finished two point perspective Art Project

I love seeing the scenes kids create in this project! Everyone starts with the same basic guidelines but are able to express their individual creativity through their drawings. Since these projects are made on paper, they are easily framed, clipped, or displayed in your preferred style.
Our Experience Making this two Point Perspective Art Project
Since this project is a bit more advanced, I tend to keep it for my middle school and above aged kids. This project is simply to teach them the basics of two point perspective. Kids can continue to develop their perspective skills by practicing this technique in future drawings of boxes, crossed paths, streets in fantasy villages, and so on.
Prep Time
5 minutes
Active Time
40 minutes
Total Time
45 minutes
Difficulty
Medium
Estimated Cost
$1
Tools
- Ruler
- Pencil
- Permanent Marker
- Coloring Medium of Choice – crayons, colored pencils, markers, etc.
Instructions
- In line with one another, make 2 dots on each side of the paper for vanishing points.
- Using a ruler, lightly draw a vertical line in the center of the page, leaving gaps between the top and bottom of the page and line.
- Use the ruler to draw two lines from each vanishing point connecting to each end of the vertical line drawn in step 2.
- Staying within these vanishing point guidelines, complete the sketch. Add more guidelines as needed, either vertical or connecting to the vanishing point. To achieve two-point perspective, all details within this project need to adhere to the guidelines regardless of if kids are drawing buildings, trees, people, etc. Items closer to the vanishing point should appear smaller and further away.
- Kids use a permanent marker to trace over sketch lines they wish to keep in their final project. Erase all unnecessary guidelines.
- Color and complete.
Notes
Two Point Perspective Art Variations
- Direct kids to depict a particular scene or season within their drawings.
- Use a heavier paper and complete this project with watercolor or acrylic mediums.
Two Point Perspective Art Variations
- Direct kids to depict a particular scene or season within their drawings.
- Use a heavier paper and complete this project with watercolor or acrylic mediums.
Other Fun Art Projects from Kids Activities Blog
What scene did your kids choose to draw? Did they enjoy drawing in two point perspective?
[ad_2]
Source link

